Simple Solutions for a Running Toilet: DIY or Call a Pro?
Are you tired of the constant sound of your toilet running? Not only is it an annoying sound, but it can also waste water and increase your water bill. Luckily, fixing a running toilet is a relatively simple and affordable task that you can do yourself with the right tools and a little know-how. In this quick article, I’m going to walk you through the steps to diagnose and repair a running toilet that I’ve learned over the last 10 years of doing maintenance at a property with over 250 toilets. Don’t worry, I’ve included pictures and labels for everything so you won’t get lost! Let’s get started!
First, Identify the Problem
The first step in fixing a running toilet is to identify the source of the problem. There are several reasons why a toilet may continue to run, including a faulty flapper, a damaged float, or a clogged valve. By understanding the root cause of the problem, you can make an informed decision on the best course of action.
Start by Inspecting the Flapper
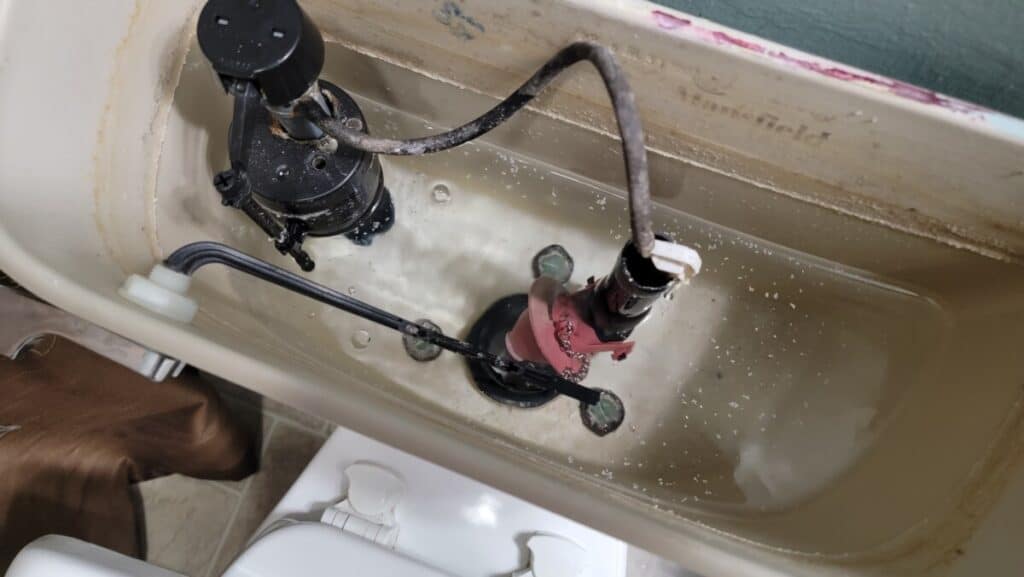
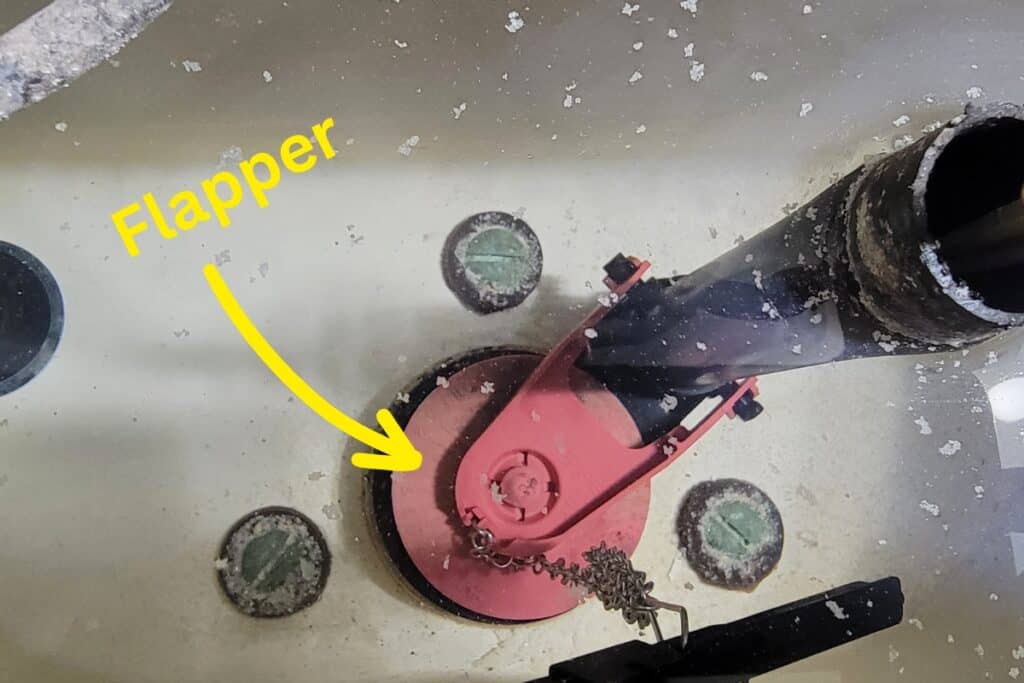
As you can see in the picture above, the flapper is a rubber seal that controls the flow of water from the tank to the bowl. Over time, the flapper may become worn or damaged, leading to leaks and a running toilet. To inspect the flapper, remove the lid from the toilet tank and flush the toilet. As the water drains from the tank, observe the flapper to see if it closes fully.
If the flapper does not close completely, it may be time to replace it. If you have hard water with lots of calcium or other minerals, you may see these build up on the flapper and this will prevent a proper seal. You can usually massage the flapper with your fingers to break up any of the attached mineral build-up.

Ensure the Float isn’t Stuck
The float is a small ball or cylinder that regulates the water level in the tank. If the float is damaged or improperly adjusted, it may cause the toilet to run continuously. To check the float, lift the lid of the toilet tank and observe the float as the water fills the tank. The float should rise as the water level rises, and it should stop the flow of water when it reaches the correct level.
If the float is not working properly, you may need to adjust or replace it. Sometimes, with the cylinder floats, hard water and calcium deposits may be creating too much friction as the float tries to move up the tube that it’s mounted on. Guiding the tube up and down several times by hand can break up these deposits as you’ll feel when it starts to get stuck and you can gently push or pull through the obstruction.


Clean the Fill Valve of any Debris that is Preventing it from Closing
If the flapper and float are in good condition, the problem may be a clogged valve. Over time, mineral deposits and debris can accumulate in the valve, preventing it from closing properly and causing the toilet to run continuously. To clean the valve you’ll need to do the following:
- Turn off the water supply to the toilet
- Press down on the cap of the fill valve and twist counter-clockwise
- Place a cup or bowl over the area where you just removed the cap to contain any spray as you proceed to the next step
- With the bowl or cup over the valve, cycle the water to the toilet on and off a dozen times to help irrigate the valve of any debris or mineral deposits
- Massage the rubber seal with your fingers on the underside of the valve cap that you twisted off to remove any mineral deposits
- Replace the cap, turn on the water to the toilet, and test

Replace the Parts
If the flapper, float, or valve is damaged or worn beyond repair, you may need to replace the parts. These parts can be purchased at most home improvement stores or on Amazon and are relatively inexpensive. To replace the parts, always make sure you’ve turned off the water supply to the toilet and drain the tank. Follow the manufacturer’s instructions to install the new parts, and then test the toilet to ensure it is functioning properly.
If All Else Fails, Call a Professional
If you are unable to diagnose or repair the problem on your own, it may be time to call in a professional plumber or a handyman you can trust. A plumber or handyman can inspect your toilet and plumbing system to identify the source of the problem and make any necessary repairs. While hiring a professional may cost more than fixing the problem yourself, it can save you time and ensure that the problem is fixed correctly.
As you can see, a running toilet is a common and fixable problem that can be addressed with a little bit of knowledge and effort. By following the steps outlined in this article, you can identify and repair the source of the problem, saving water, money, and headaches in the process. If you are unable to fix the problem on your own, don’t hesitate to call in a professional plumber or handyman for assistance.


